Mac Users
The Outlook for Mac 2011/2016 desktop applications don't provide the ability to subscribe to an internet calendar, but there is a workaround that may work for you.
There are two ways to synchronize your calendar in Outlook:
- One-way sync (iCal) - allows you to view, but not update, Team Calendars events in Outlook.
 Recommended (easiest) method
 - Two-way sync (CalDAV) - allows you to view and update Team Calendars events in Outlook. This option requires a free CalDAV Synchronization plugin for Outlook, and is only available for Windows users. Requires Team Calendars 6.0 or later.
Subscribe with one-way synchronization (iCal)
One-way synchronization means that you can view, but not update, Team Calendars events in Outlook. This option is best for people who are not able to install the CalDAV Synchronization plugin.
1. Grab your Team Calendars URL
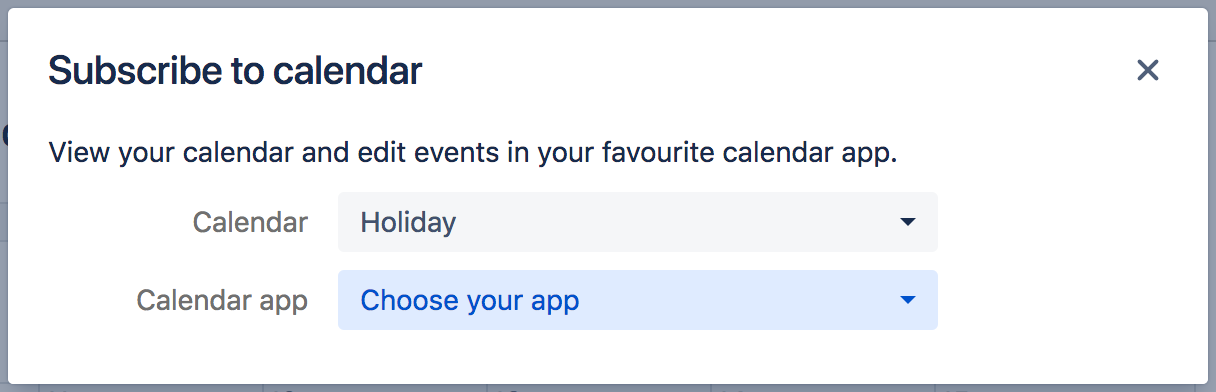
- Choose
 to the right of the calendar name, then choose Subscribe.
 - Select iCal from the Calendar app dropdown (don't choose Outlook for one-way sync).
- Copy the Calendar URL.
2. Subscribe to the calendar in Outlook Desktop
- Choose Calendar at the bottom left of the app.
- Choose Open Calendar > From Internet in the ribbon.

- Paste the calendar address and choose OK.
3. Subscribe to the calendar in Outlook Office 365
- Go to the Calendar in the bottom left of the app.
- On the left-hand navigation just above My calendars, choose Import calendar...From web
- Paste the calendar address URL in the Link section and give your calendar a name, then choose Import

Subscribe with two-way synchronization (CalDAV)
![]() Two-way synchronization is only available for people using the Microsoft Outlook desktop application on Windows, with the CalDAV Synchronization plugin installed.
Two-way synchronization is only available for people using the Microsoft Outlook desktop application on Windows, with the CalDAV Synchronization plugin installed.
1. Download and install the CalDav Synchronization plugin
Before you begin:
- Download a CalDAV plugin for Outlook.
We used CalDAV Synchronizer, which is free. Other plugins may be available. - Install the plugin. You may need to talk to your admin if you don't have permission to install applications on your PC.
2. Grab your Team Calendars URL
In Confluence:
- Choose the Subscribe button at the top of your calendar.
- Select Outlook from the Calendar app dropdown.
- If prompted, add the calendar to My Calendars.
- Copy the Calendar URL.
Because the CalDAV Synchronization plugin supports calendar discovery, this will be your Confluence URL, not the URL of an individual calendar. You'll be able to choose which calendar (that you've added to My Calendars) to sync in Outlook.
3. Subscribe to the calendar in Outlook
In your Outlook desktop application:
- Choose CalDAV Synchronizer from the ribbon / toolbar.
- Choose Synchronization profiles.

- Click the + button to add a new profile.

- Choose Generic CalDAV / CardDAV from the Profile type screen.
- Give your profile a name, for example Confluence Team Calendars
- Select an existing calendar folder, or create a new one.

- Enter the Confluence URL you copied earlier in the DAV URL field.
- Enter your Confluence username and password.
- Click the Test or discover settings button to connect to Team Calendars.
- If the test is successful you'll see a list of resources. Choose the calendar you want to subscribe to.

- Choose how often you want Outlook to sync back to Team Calendars.
The default is every 30 minutes, but you may want to sync your calendar more often. - Click OK to save your new profile.
- Back on the CalDAV Synchronizer tab, choose Synchronize now to sync the calendar for the first time.
- If your calendar doesn't appear, you may need to select it from the My Calendars list.
