Caveats
Once you create an item (metadata only or with files) you are the owner of that item. This is separate from the author list. ![]() only the owner of an item (or the figshare admin) can add/remove files or update its metadata
only the owner of an item (or the figshare admin) can add/remove files or update its metadata
If you're not ready to upload files, but need a DOI, you can create a Metadata only record
You can link to data stored elsewhere, e.g., in DAMS or on another website, by clicking the Link file button at the top of the metadata entry screen.
![]() you do NOT need to create a "project" to upload data. In fact, you probably will never need to create a "project" - see Create collaborative spaces using "projects"
you do NOT need to create a "project" to upload data. In fact, you probably will never need to create a "project" - see Create collaborative spaces using "projects"
Figshare is a repository not a regular website.
Once you hit PUBLISH and save YOU CAN NOT PERMANENTLY DELETE.
Any files associated with the published dataset will be available - even if you remove them - because the dataset is versioned. The removed files will still appear under an older version.
Datasets and their associated metadata can only be permanently removed by an administrator - contact Thompson, Keri if you need a dataset permanently deleted.
Overview
There are 5 ways to get data and associated files into Figshare:
- using the browser (most common)
- using the desktop uploader app
- using ftp (for large files or flaky connections)
- through the API
- by importing an entire repo from GitHub
Add data files
From the browser
![]() This is the most common way to upload files that are under 5GB into figshare. If your files are over 5GB, please use the FTP option below.
This is the most common way to upload files that are under 5GB into figshare. If your files are over 5GB, please use the FTP option below.
For browser upload, after logging in under the My data tab choose either
- + Create a new item button
- The metadata editing window will come up and you can upload your data files or, if you want to create a metadata only record check the box next to
 Metadata record only and begin adding your descriptive metadata.
- The metadata editing window will come up and you can upload your data files or, if you want to create a metadata only record check the box next to
- Or drag/drop or browse to upload files

- the metadata record screen will then appear and you can begin adding descriptive metadata for your files.
- the metadata record screen will then appear and you can begin adding descriptive metadata for your files.
Using the "desktop uploader"
Note: support for the uploader app will be phased out after 2020. The app will still work, but figshare won't be actively supporting it's use. FTP upload can be used instead.
- download the appropriate uploader for your operating system at https://figshare.com/tools
OR on a Smithsonian computer you can find it in the Software Center (there should be a shortcut on your desktop.) - when the tool finishes installing, run it. The default login option is for a personal account. You must change to Institutional account
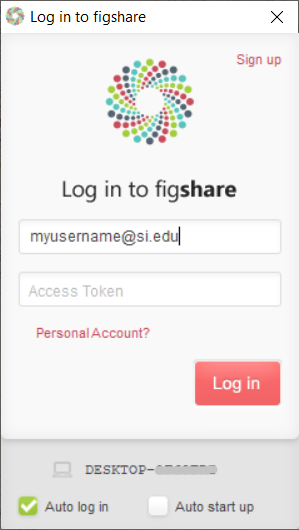
Enter your SI email address for the username and in the second box do not put your SI network password. Instead of a password you will need to generate a personal token from within figshare and enter it there.
You only need to do this once. - While you are logged in to figshare go to the menu under your user icon in the upper right corner of the screen and choose Applications. Scroll to the bottom of the screen and in the Personal Token section click the button to Create Personal Token. A box will pop up with a secure token.
- Copy and paste this token into the Access Token box on the uploader login screen.
- You should now be able to log in.
Using FTP
You must have an FTP client. The preferred client at SI is Filezilla which is available for installation in the Software Center.
After logging in to figshare, under your profile go to Applications

note your Username (number) and generate a password for use in the FTP client by clicking the Generate Password button.
![]() ftp connection may fail if you are using the F5 VPN to connect to SINET. Simply disconnect from F5 before using ftp
ftp connection may fail if you are using the F5 VPN to connect to SINET. Simply disconnect from F5 before using ftp
FTP client settings:
Host: ftps.figshare.com
Transfer mode: should be set to passive. (This is the default but it's best to double check.)
Username: Located on the Applications page
Password: Generated on the Applications page
If you generate a password, you need to store it safely as it will not be displayed in the interface. However, if you forget it you’ll always be able to generate a new one. In this case, the old password becomes unusable.
After connecting to the figshare FTP, you will need to create a directory to receive your file(s)
![]() the directory name will become the "title" of your dataset. The character limit is 200 and can't include \ / : * ? " < > | ' { }
the directory name will become the "title" of your dataset. The character limit is 200 and can't include \ / : * ? " < > | ' { }
More information on FTP directory naming
After uploading file(s) you can rename the dataset and add necessary metadata by editing the item in the web interface.
![]() if you need to delete files from your unpublished dataset, you can't delete them in the FTP client, that can only be done via the browser interface
if you need to delete files from your unpublished dataset, you can't delete them in the FTP client, that can only be done via the browser interface
Using the API
If you have very large files ( >10 GB ea), many files to upload, or want to automate periodic transfer of files
please contact SI-RDM at SI dot EDU to arrange upload via the API.
If you are comfortable using REST APIs, you can find documentation here https://docs.figshare.com/
From Github
If you have code, data, or related research outputs in Github that you'd like to publish as a zipped repository on Figshare with a DOI, you can connect your figshare account to your github. If you choose to sync with Github, a new version will be created with each new release.
See Connect your Github account and import repos for more information.
Reserve a DOI (no need to upload files)
Table of Contents